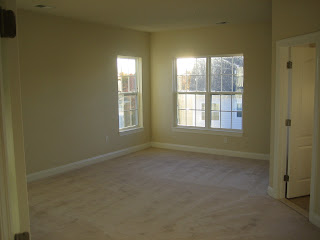
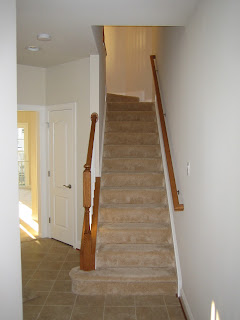
Our house:

Before:

After:

Next, I started on the dining room area. For some unknown reason, I had always dreamed of having a red dining room, so that's what I did. Again, I used Behr Premium Plus, this time in a satin. Unfortunately, I don't seem to have the color name anymore. I love dark colors on the walls, especially in our house, which gets tons of sunlight, but they are a lot of work to paint. This room took 3 coats. I didn't use a primer in any of the rooms since they were already such a light, neutral color. Thanks, Dad, for finishing the last coat when I was perhaps starting to regret having picked such a dark color. Note that the before and after shots weren't taken at the same time with any sort of plan, so they're not always the same part of the room.
Before:

After:

The next room to get painted was the living room. Again, my parents helped out with this room. By now we had used up our Home Depot gift cards, so I felt free to return my loyalty to Sherwin Williams, where my sister worked for several summers during high school and college. When I went to buy the paint, they were having a holiday weekend sale, so I got their best paint at the time, Duration, in a satin enamel, tinted to Scanda.
Before:

After:

Since the walls are now such bold colors, for our furniture, we mostly stuck to neutrals, like chocolate brown. Yum!
Next I moved on to the kitchen and hall area on the main level. I continued to stick with the Sherwin Williams Duration satin, this time in Trusty Tan. This part was a little tricky because I had to do a lot of climbing on the counters to paint above the cabinets. Another tricky area was painting the stairwell. Luckily, Zach had bought this fancy ladder that lets you adjust each side separately, so I could put one side out longer and use it on the stairs! Without that, I don't know how I would have gotten up near the ceiling. The stairs and entryway, I painted a slightly lighter shade of tan, called Sand Dune.
Before:

After:

Before:

The last room to be painted so far is the guest room. We actually just painted this room recently. I had initially thought of painting it a sort of grayish violet to go with some of the colors in the bedspread. However, after more consideration and discussing with my sister, I decided to got for more of a gray with a vague hint of violet, so as to not overwhelm the small room with purple. Unfortunately, this plan went awry when I got the paint home and opened it up -- it was lavender! I know that paint can sometimes dry less intense than they appear wet, so Zach and I went ahead and did a first coat. All day, I kept saying, "Do you think it's too purple?" and Zach would say, "No, I think it's fine." However, the next morning, when the bright sun was streaming in the front of the house, we both agreed that it was totally lavender. We had also used more than half the paint and so were going to need a bit more. Again it was time for a call to my sister, the family paint expert. She recommended getting a paint sampler tinted to the original color, mixing it well with the remaining paint, and then having it retinted. The retinting would be somewhat by guesswork, since it still wouldn't be a whole gallon, but I generally trust the people at Sherwin Williams. To seem slightly less sketchy about buying a sample size, I used 2 different stores since we have 2 pretty close to our house. I went to one for the sample, went home and mixed it with my paint, then went to the store where I'd originally gotten the gallon and had them retint it. This went surprisingly well. The Sherwin Williams guy was able to make my paint much more gray (by adding gold, of all things), and though the lavender from the first coat still comes through, it's much more toned down. The original color was Mysterious Mauve, but of course now it's some random, unofficial color.
Before:

After:

For the master bedroom, we used Blue tape around the ceiling and baseboards. After that, I found taping to be such a time-consuming process that I tried to avoid it. I think I did still tape the ceiling in the dining room and in the guest room, but otherwise I just used a brush very, very carefully to cut in all the edges. Along the baseboards isn't too bad since they're super shiny and easy to wipe off with a damp paper towel if you mess up, which I do a lot. The ceilings are a flat finish, so super not easy to wipe off. I learned a trick from somewhere on the internet, I think, which helped some. You use something like a wide, flat putty knife and hold that next to the ceiling. As you paint, you move the knife along with the brush. That way, any leakage up from the brush just gets on the knife instead of your ceiling! Of course, if you look not too closely, you can still see spots on our ceiling in various rooms where I got paint on that I couldn't get off. I just try to pretend that no one really looks at ceilings.
So those are my wall-painting adventures. I've found it to not be very difficult, especially if you use painters tape for edges, but always more time-consuming than I expect, even when I remember that it's always more time-consuming than I expect. I may someday paint the upstairs stairwell and hall, probably a similar brown tone to the kitchen, but for now, I'm content with the non-beige extent of our house.

No comments:
Post a Comment